Keyboard plate (PE) foam mod – complete beginner’s guide (with photos)
PE foam mod – one of the most known keyboard mods alongside lubing switches and tape mod. Most of the new keyboard modders want to perform this mod on their keyboard. Are you one of them? Or do you just want to get the most out of your keyboard?
Either way, in this detailed article I will tell you everything that you need to know. Starting from the general information about this mod. Then I’ll talk about the preparations and the way to perform this mod. Finally, I’ll answer some questions that you might have.
Everything. And even more. See, PE foam mod isn’t the best for beginners. I don’t recommend you perform it the regular way as your first mod. That’s why I’ve developed my own method – a TypingDoneWell original. You’ll see it later.
What tools do you need for the PE foam mod?
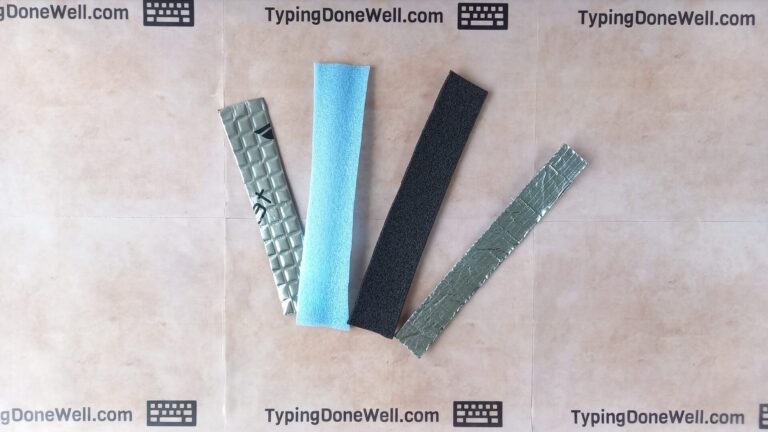
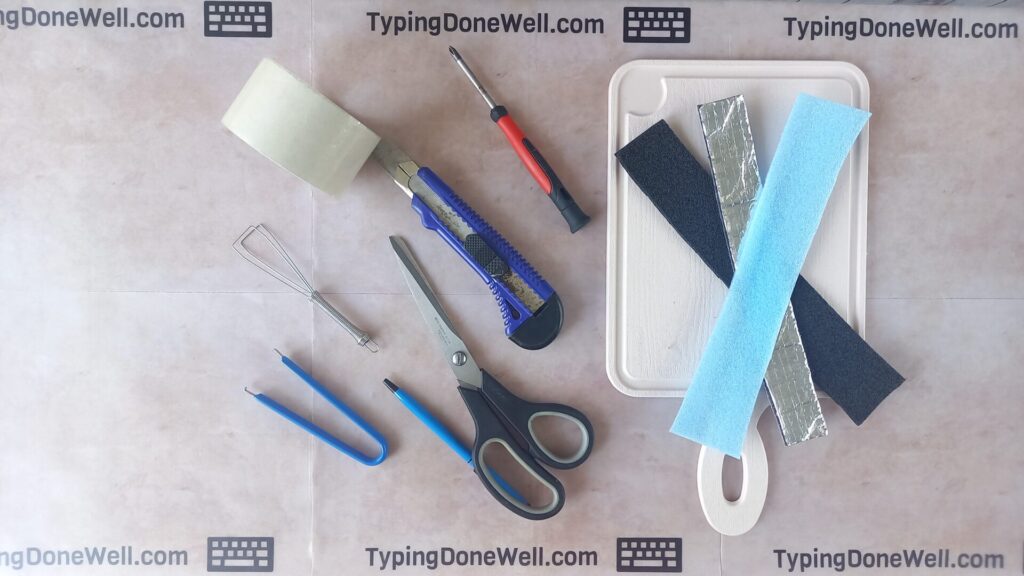
| Foam | First of all, you need a foam that you’ll use for this mod. You can read a bit more on how to choose a foam here – CHOOSE A FOAM FOR PE FOAM MOD |
| Scissors | You need just a regular pair of scissors. It’ll be probably better to have a longer pair of scissors. This will make it easier. |
| Box cutter | You might need a box cutter depending on the method you choose. You should already have it in your house. If not, don’t buy it until you read this whole article. |
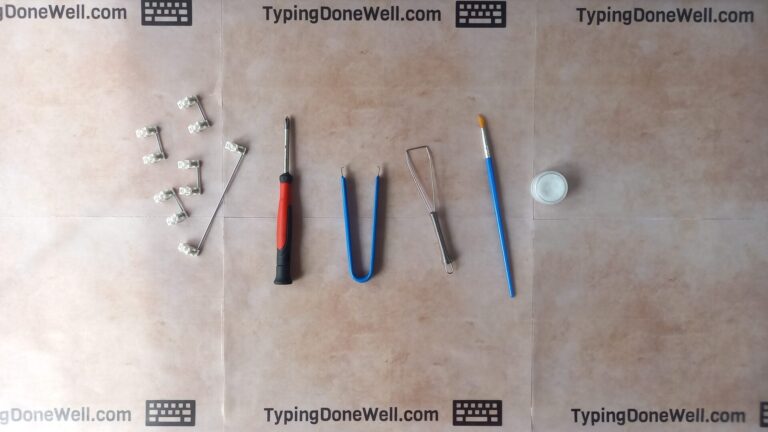
| Screwdriver | You need a small screwdriver to disassemble the keyboard. There’s no need for fancy ones. Just a regular manual screwdriver from your local hardware store will be more than enough. Or you can buy a set of precise screwdrivers here – BUY SCREWDRIVER SET |
| Stick (sharpened) or a pen | This is optional. You need something to poke holes in the foam. I use the screwdriver, which works well enough. But, if you have trouble using it, you can get a stick. |
| + Tape | It isn’t necessary to use tape but it’s easier to secure the foam with it. A tape will be useful. |
| + Keycap puller | You need to disassemble the keyboard. If you’ve never done it before you’ll need a keycap puller for that job. You can read a bit more about disassembling the keyboard here – ARTICLE DISASSEMBLE KEYBOARD. You can also buy this tool directly here – BUY KEYCAP PULLER |
| + Switch puller | Similarly as with the keycap puller. You’ll need it. You can read more about why here – ARTICLE DISASSEMBLE KEYBOARD – or you can buy it directly here – BUY SWITCH PULLER |
| + Cutting board | This is optional as well. If you’ll be using a box cutter you’ll need something to cut the foam on. Naturally. |
That’s quite a lot of tools, isn’t it? Well, it only seems like that because of how big this table is. In fact, you can break them down into two groups.
First, you need a keycaps puller, a switch puller, and a screwdriver to disassemble your keyboard. You can read more about that here – ARTICLE DISASSEMBLE KEYBOARD
For the PE foam mod, you only need the foam and something to cut it (scissors, a box cutter, a screwdriver or a stick, and a cutting board). That’s it. If you’ve done any mods to your keyboard you should have a keycap puller and a switch puller already.
What is a PE foam mod?
I don’t know who one day though – let’s place a foam under the switches and see what happens. Well, thankfully he did. It is said that this mod is inspired by the sound of the Jelly Epoch keyboard from Owlabs. In this keyboard, there was a thin layer of PE foam between the plate and the PCB.
That’s why people call it PE foam mod. In reality, it doesn’t need to be performed only using PE foam (a type of material). It can be done using way more interesting materials.
A more fitting name for this mod would be „plate foam mod”. That’s what it is. It doesn’t matter what material you’re using. As long as the method and placement of this material are the same it’s still this mod.
PE foam mod is a keyboard mod that depends on placing a piece of PE foam between the plate and the PCB of your keyboard to change the sound it makes. However, you can use other materials (rather than PE foam). That’s why a more fitting name would be „plate foam mod”.
It doesn’t really matter what you call this mod. As long as you know that you can use other materials and experiment a bit to create more unique sounds.
How does a PE foam mod work?
It’s interesting how this mod was discovered. What’s even more interesting is how it works. It’s fascinating how somebody can create something that works well without even knowing why it does it. But today we’ll learn how it works.
PE foam absorbs certain frequencies while amplifying others. Thanks to that property PE foam mod changes the sound of a keyboard. It works as a filter that modifies the sound of the keyboard switch it’s placed under.
PE foam is just a sound filter. It makes lower (switch) frequencies less apparent and strengthens the middle ones.
I can’t take credit for discovering this. There has been a scientific experiment that studied the properties of PE foam on sound. Here you can read a whole paper – PE FOAM STUDY
Most of you won’t read this scientific document. I don’t blame you. Here’s the most important piece of information from it:
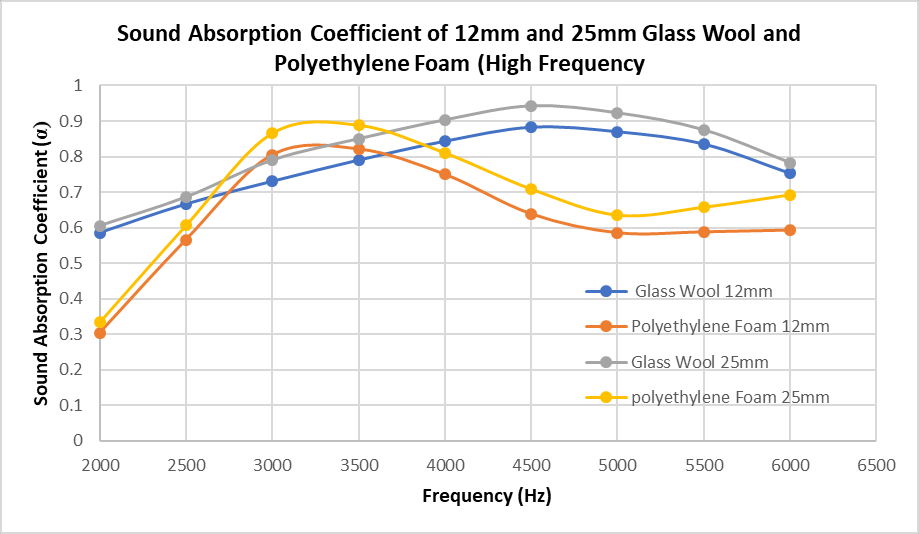
On this graph, you can see that some frequencies tend to be more suppressed than others by the PE foam. This material property combined with the sound profile of your keyboard switches is what makes the difference in sound. It’s a sound filter.
What foam should you use for the PE foam mod?
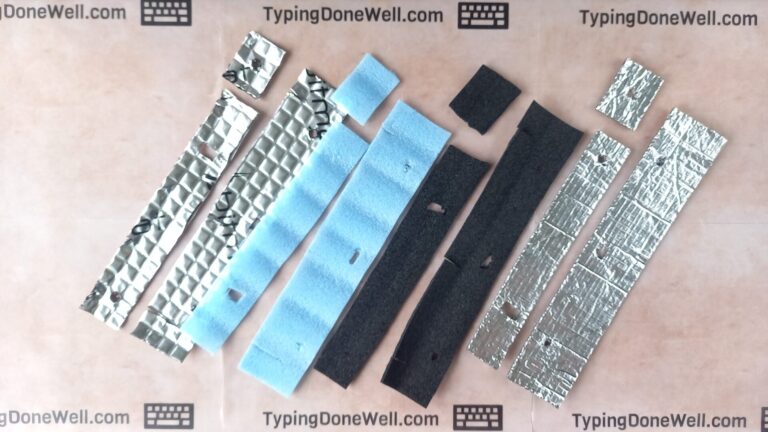
You might be surprised but you don’t need to use the PE foam for this mod. That’s why I prefer the name „plate foam mod”. There are actually many more foams that you can use in order to change the sound of your keyboard. Here I’m gonna talk about three of them.
There are many more options. In fact – limitless. I encourage you to try different materials yourself. It’s pretty fun to experiment and create a completely unique keyboard with your own touch.
But there’s plenty to talk about when it comes to choosing the right material for plate (PE) foam mod. I’ve made a detailed article with a few materials (tested by me) and rules to guide you through experimenting yourself. You can read it here – ARTICLE FOAM FOR PLATE (PE) FOAM MOD
I’ll be honest, I thought I could fit this comparison in this article. But there’s so much information that this guide would be insanely long. It will be a lot cleaner for you to read across two detailed articles than one with less information.
What is the best thickness for PE foam mod?
You chose the material that you want to use in the plate foam mod. What about the thickness? How thick your foam should be?
PE foam mod requires you to place a layer of foam between the switches and PCB. That’s why the foam itself needs to be as thin as possible. The best thickness is 1 mm. However, you can perform the plate (PE) foam mod with foam as thick as 1.5 mm.
Luckily, it doesn’t really matter which material you choose. All of them need to be quite soft for the reasons I described in the comparison article. That’s why the thickness is universal across different materials.
Make sure your foam is at most 1.5 mm thick. If it’s thicker you’ll have trouble performing this mod on your keyboard. The switches simply will not fit. You’ll have to press them harder which makes it easier to damage them.
Can you PE foam mod a soldered PCB keyboard?
Up until this time I was talking about the hot-swap keyboard. This raises a certain question. Can you PE foam mod a soldered PCB keyboard?
You can’t PE foam mod a soldered PCB keyboard. In most cases, the heat from soldering switches will melt the PE foam causing damage to your keyboard’s PCB. Do not attempt this mod on a keyboard that is exposed to extraordinary heat.
In normal circumstances, PE foam won’t melt. Even if your battery heats up. Even in summer. However, soldering creates a very high amount of heat in a small area in order to connect switches to the PCB. This will cause the PE foam to melt.
It’s not worth risking your PCB for such a mod. If you have a hot-swap keyboard, go ahead. If you have a soldered PCB one, stay away from the PE foam mod. No matter what material you’re using. Even acoustic foam.
How to PE foam mod your keyboard?
We finally arrived at the essence of this article. Doing the mod itself. However, the prep work is just as important as this section. So, if you skipped it I recommend you go back and read the preparation.
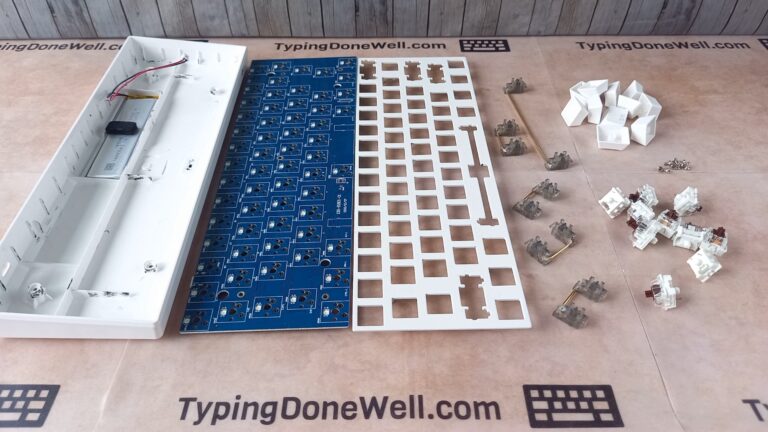
I will assume that you read it. So, the first thing you need to do is disassemble your keyboard. I’ve made a detailed article on how to do that. With photos and videos. You can read it here – ARTICLE DISASSEMBLE KEYBOARD
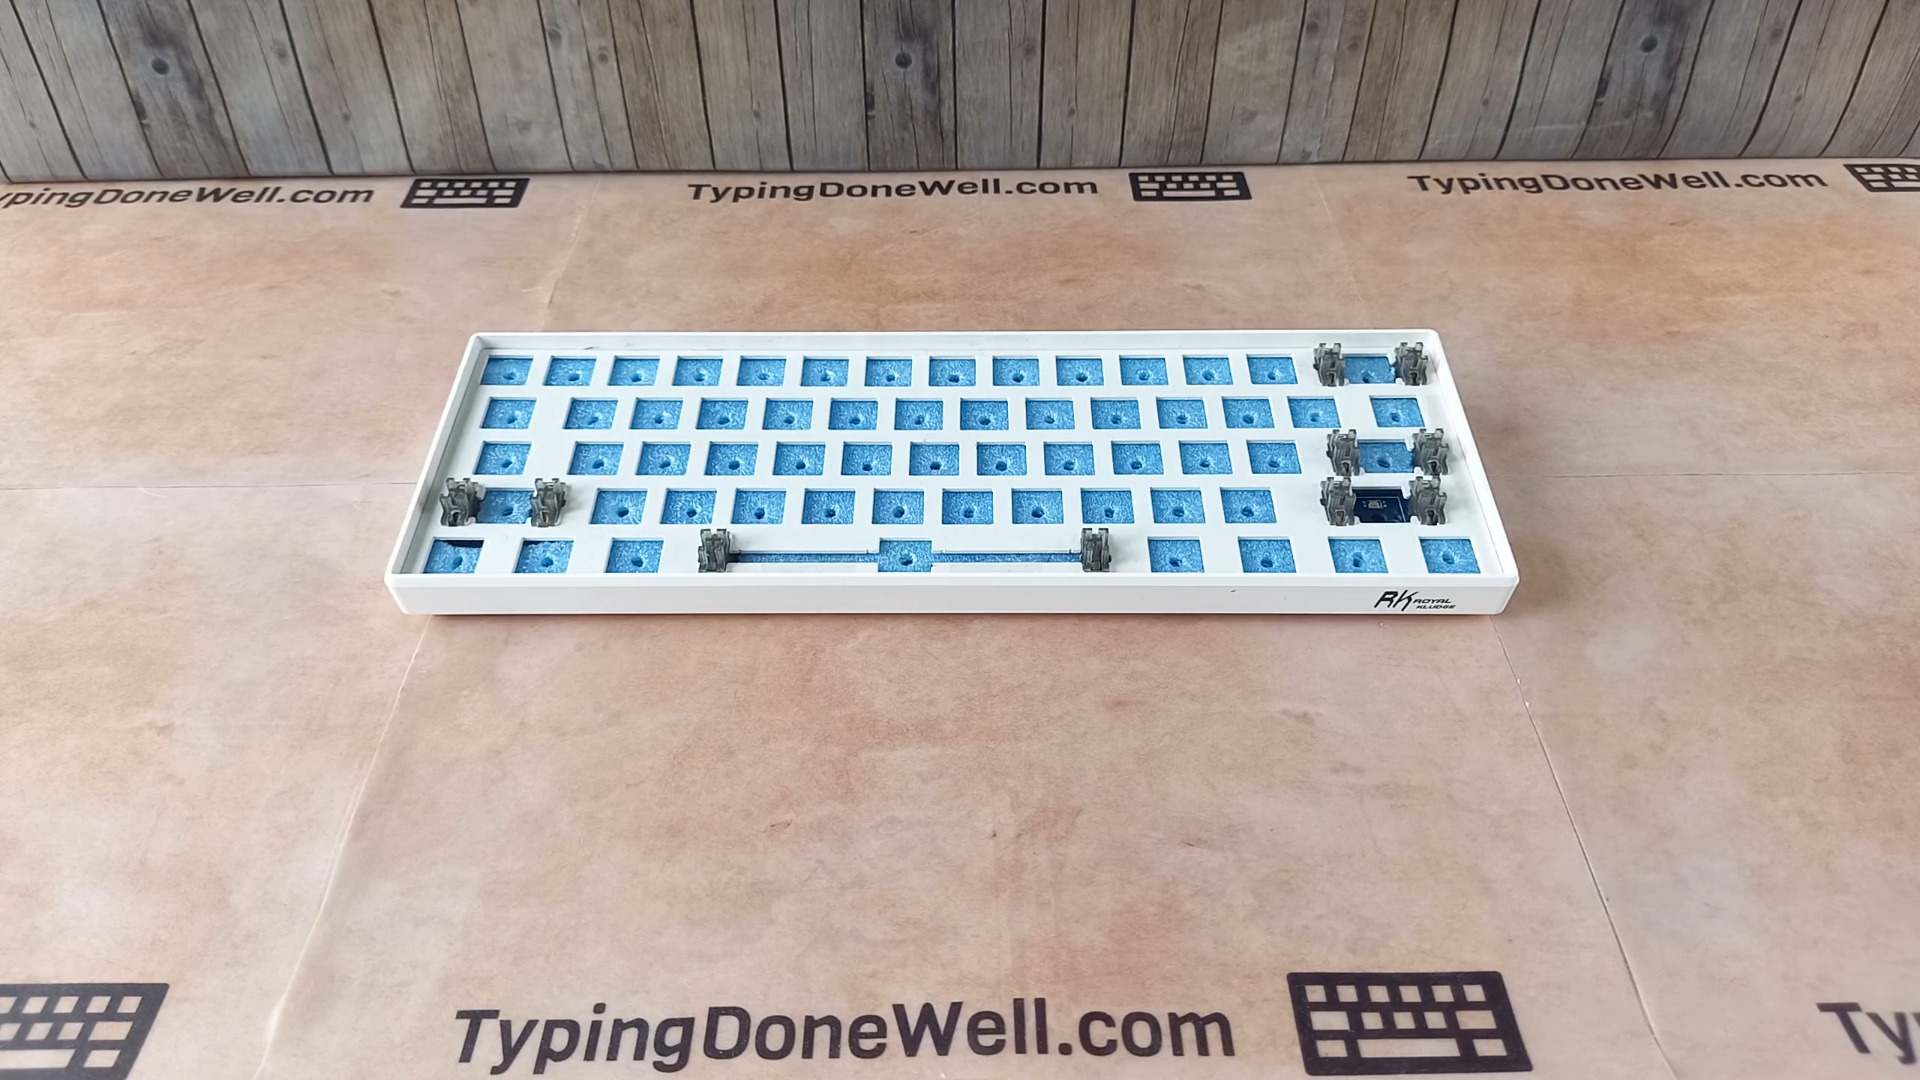
Now you should have your keyboard’s PCB with the plate in front of you. That’s how it should look like:
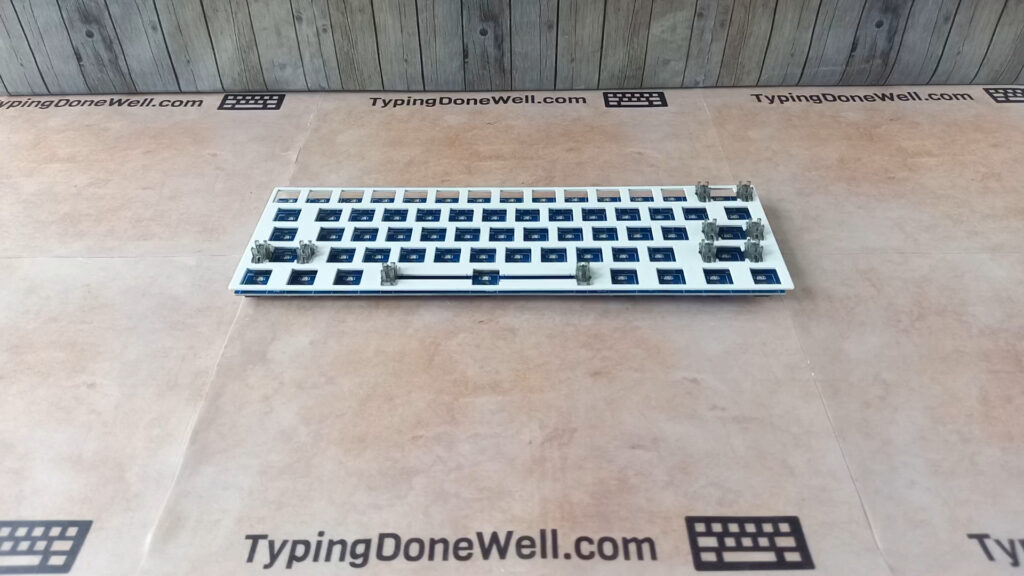
That’s where I will give you two options. There is a regular way to perform the PE foam mod. However, there’s also another way. The method I’ve promised you at the beginning of this article. Remember?
Now, both methods are fine to do and both have their advantages and disadvantages. Let’s start with the regular way and then I’ll show you my original method to PE foam your keyboard.
How to PE foam mod your keyboard? (regular method)
Before we start – this method isn’t best for beginners. You can easily damage your switch pins. Be careful! Take things slow and don’t rush performing this mod.
If you happen to bend your switch’s pins you can in many cases save them. I’ve made an article guiding you through that. It’s better to be cautious but if you damage your switch’s pins you may be able to save them – ARTICLE REPAIR SWITCH PINS
Now, let’s start doing this mod. Shall we?
- Examine the plate for any sticking-out parts
This will come in handy later on. First, look at the keyboard’s plate – the side that faces the PCB. Look for any sticking-out parts that you’ll need to make holes for in the foam.
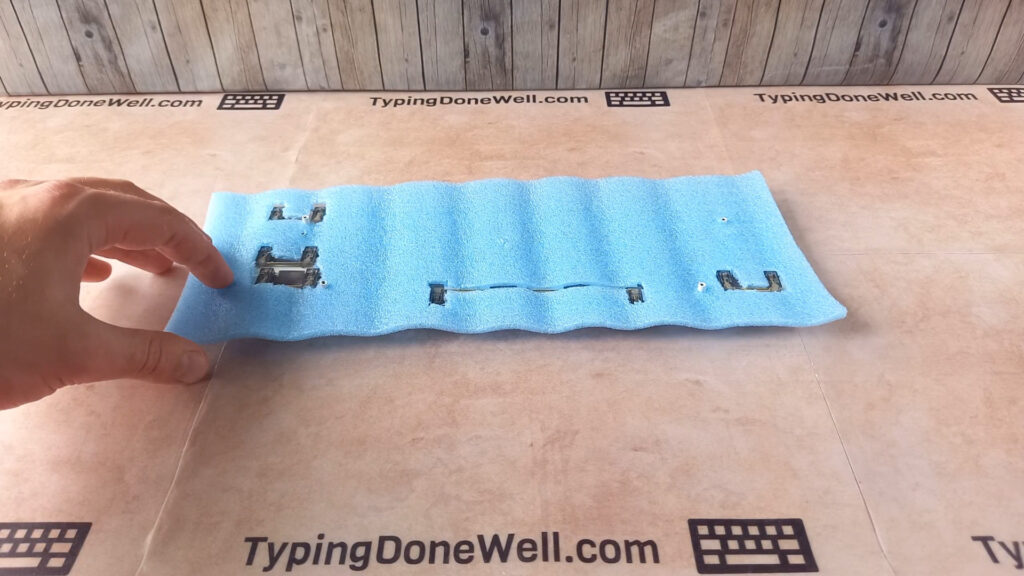
- Lay the foam on the plate. Poke out holes and cut sections for any sticking-out parts. Also, cut sections for stabilizers
You need to make the foam lay completely flat on the plate. While doing so try to cut as little material as you can. That’s how it should look like:
- Screw the PCB and plate together. This will hold the foam in place. You can also tape the foam to the plate to secure it better
Adding tape is good. But you have to watch out where you put this tape. Make sure that it doesn’t cover any place where the switch or stabilizer goes. It means that the tape will barely be visible on the foam.
- Make holes for the switches
Now you need to make holes roughly in the middle of the square that switches go to. It’s really hard to be precise in this PE foam mod method. It should look something like that:
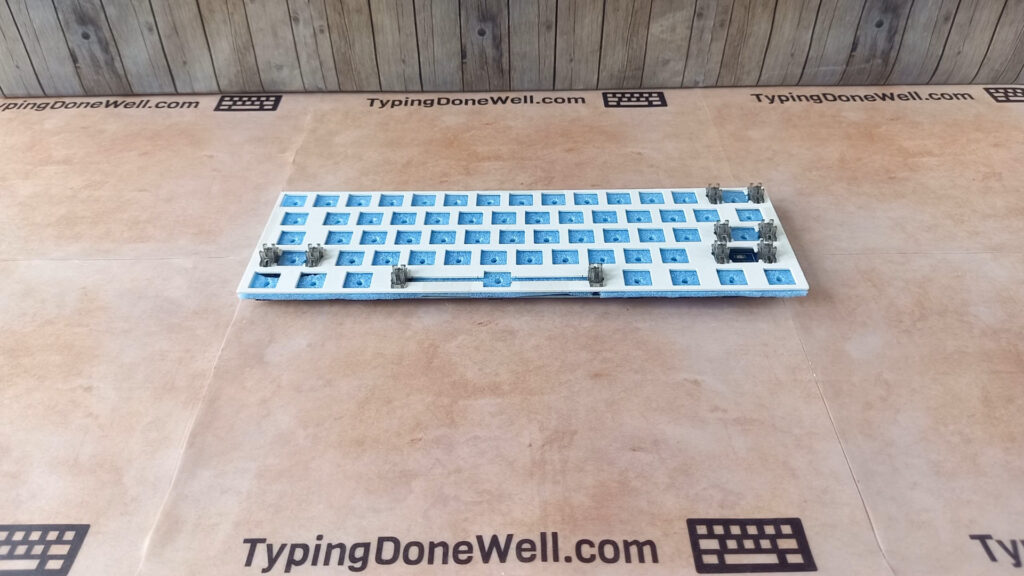
Now would be also time to make holes for RGB lights. However, it’s difficult to do. I think that for preserving RGB lights my method is way better. This method (regular method) will block your keyboard’s LEDs.
- Place a few switches (5-6) into the PCB and plate. Place them in the far corners and in the middle. This will hold the foam in place
- Screw the plate and PCB back together and assemble everything back into the keyboard case
- Carefully place all the remaining switches into the PCB. Be cautious! It’s easy to bend your switch’s pins while doing so. Don’t rush and don’t apply a lot of force
At the end of that, you will have a PE foam modded keyboard. Here’s a video that I’ve made to show you the whole process better:
This isn’t the best method for beginners. Plus it will cover your RGB lights. It’s honestly quite an annoying way to perform this mod. I never liked it. That’s why I developed my own method which I’ll show you now.
How to PE foam mod your keyboard? (TypingDoneWell method)
This method relies on breaking the foam down into small pieces – each individual for every switch. It’s quite interesting by itself and gives more possibilities.
This note is mostly for my fellow content creators: Respect the author of this method. You can talk about it in your own content as long as you credit the author (TypingDoneWell) and link to this article.
There are, of course, advantages and disadvantages to my original PE foam mod method. Let me show you them:
Advantages of my original method vs the regular method
- Way safer for your switches. It’s easier to do and safer to perform. That makes it more suitable even for complete beginners
- It enables you to preserve RGB lights. This method allows more precision and makes it easier to leave holes for the keyboard’s RGB lights
- Allows more customization. Because each switch has an individual piece of foam you can custom-tune your keyboard down to the particular switches (by changing the foam material)
- It lets you test the sound difference of new materials with just a few switches – without committing to a whole PCB like in the regular method
Disadvantages of my original method vs the regular method
- It takes more time. You can create one template and cut the foam onto a particular shape to speed things up. Still, my method will take more time
- Has less material and makes slightly less of a sound difference
Now that you know how my original method compares to the standard method you can choose which one fits you better. It’s time to talk about my method in a more practical way. That’s how you PE foam mod your keyboard using the TypingDoneWell method:
Before you start – you don’t need to take the PCB and plate out of the keyboard. You just need to remove all the keycaps and switches before you continue.
- First, you need to take a piece of foam a bit bigger than the switch. Place it on the bottom of your switch (that’s out of the keyboard of course)
- Pierce a hole in the foam for the switch. Place the foam onto the bottom of the switch and cut it to the switch’s size
- If you have RGB that you want to preserve cut a hole for it in the foam
- At this point, you should have a template that you can use to quickly cut pieces later. Now cut as many of those little squares as you need
- Finally, place all the switches with pieces of foam into the keyboard
The whole process is fairly simple. Still, I’ve made a video to show you this method better:
It’s simpler and way safer to do it that way. It still makes quite an impact on the keyboard’s sound (depending on the foam material). Plus it’s easier to repair it if something goes wrong – you don’t need to worry about the alignment or tearing the whole thing down like in the regular method.
You can perform this mod using either method. Choose the one that fits you the best, I won’t be offended if you don’t choose mine. It’s there to help you.
Is PE foam mod safe for the keyboard?
PE foam is a very popular mod. That’s why it’s important to answer this question – is it safe to PE foam mod your keyboard? I think that after reading my article up to this point you can guess the answer. But I prefer to make it clear.
PE foam mod isn’t particularly safe for the keyboard. Doing this mod can cause damage to switches if done incorrectly. However, once this mod is done it is completely safe for any hot-swap keyboard. What it isn’t safe for are soldered PCB keyboards, you should not try it on those.
There’s a lot of variability in this answer. Well, that’s the nature of this mod. You need to be very careful when performing it yourself, especially if you’re doing it for the first time. That’s one of the reasons I came up with my own method – to make it safer for beginners.
If you missed my original method that makes this mod safer you can read about it here – MY PE FOAM METHOD
Does PE foam mod block RGB?
This is a valid question that you need to ask yourself when choosing this mod. Does it block RGB?
PE foam mod does block RGB lights on the keyboard when done using the regular method. It places a piece of foam between PCB and the plate, covering the LEDs responsible for RGB lighting. You can get away with performing this mod and preserving RGB using the TypingDoneWell method.
This mod isn’t the best for RGB lights. It is quite difficult to create such a precise piece of foam with holes for RGB lights. Then aligning them in the right place is even more challenging. If you want to keep your keyboard lighting you can either pass on that mod or perform it using my modified method.
Now, a few words at the end of this article.
I hope that my original method helps you with this mod. However, whether you perform it the regular way or with my method, be careful. It’s easy to damage your switches or even PCB components if you’re not. Take your time. You’ll thank me later.
Let me know how it went in the comments down below. I hope you’ll have a great time doing this mod yourself!
