Keycaps upgrade guide for mechanical keyboard (with helpful videos)
A mechanical keyboard has many components. Each one of those has a different job to do in order to make the keyboard work properly.
People who mod keyboards, just like me and maybe soon you, take those individual components and make each one of them better. Thanks to that, once you put all of those parts back together, your keyboard suddenly becomes completely different.
Today we’ll focus on the keycaps. Every keyboard has them, it’s an essential part of it. This is the part of every keyboard which you have a constant, physical contact with when typing. So it’s important to use keycaps that make you feel good when typing.
In this article, I will cover everything you need to know about changing keycaps on your keyboard – a bit of theory, tips, and a detailed practical guide with videos that I’ve made. However, that’s not all there is to changing your keycaps.
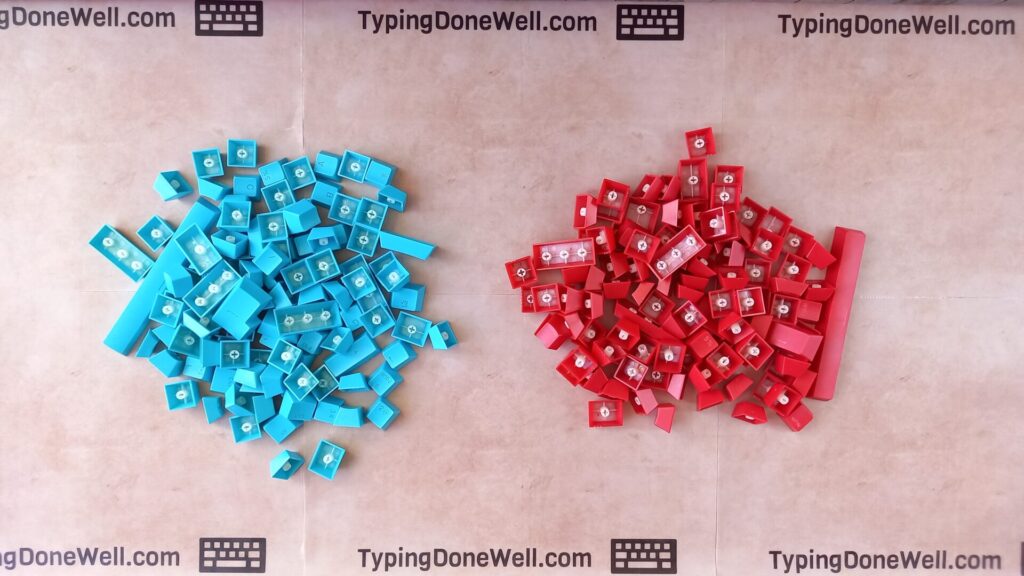
Before you even start thinking about how you can change those you need to choose the right keycaps set for yourself. That’s why I recommend you check out my two other articles first.
One is about everything that you need to know about the mechanical keyboard’s keycaps. All the theory that you would even want all in one place. You can read it here – ARTICLE EVERYTHING ABOUT KEYCAPS
The second one will show you exactly how to choose the right keycaps set for yourself based on your goal with the keyboard. It’s a quick one but it will complete the whole picture – ARTICLE HOW TO CHOOSE PERFECT KEYCAPS
What will you need to change your keycaps?
| Keycaps puller | Most of those are fairly similar to each other. You don’t need to overthink buying one of those. However, if you want to be sure that you’re buying the right tool here’s a link to one – BUY A KEYCAP PULLER |
| A set of new keycaps | There are plenty of keycap sets on the internet that you can buy. Buy whatever one you like the most. Here are some great ones that you can choose from – BUY A KEYCAPS SET |
In order to change your keycaps you will need one tool – keycaps puller. Now, a lot of you are thinking right now if you can change the keycaps without it. If that’s what you’re wondering I’ll talk about it later in this article. Here to be exact – DO YOU NEED A KEYCAP PULLER.
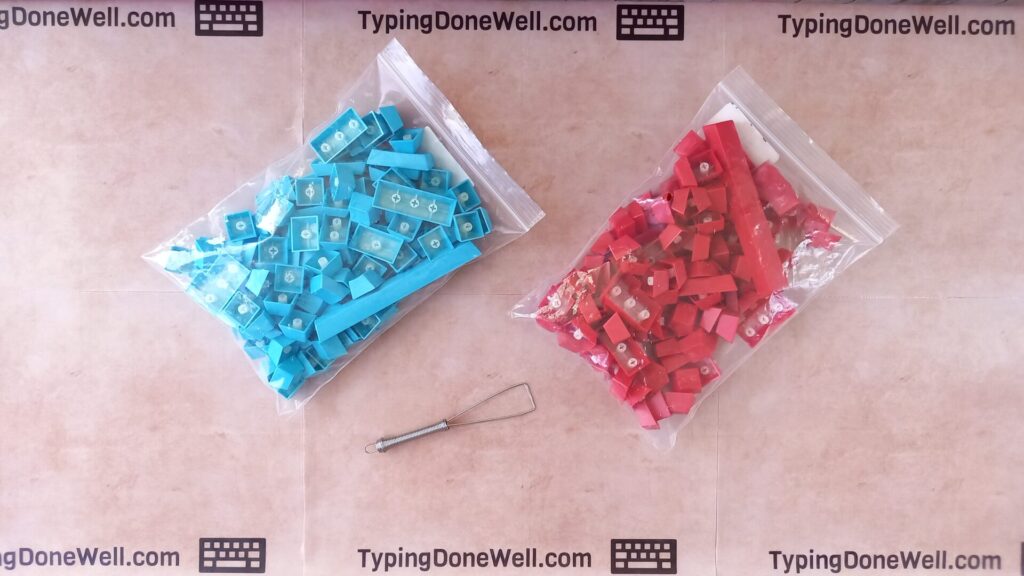
Other than the tool that you’ll use to get the old keycaps out of the keyboard you’ll also need a new set. That’s pretty obvious but I’ll remind you either way.
How do you safely remove keycaps from a keyboard?
Before we just into taking the keyboard apart let’s talk safety. Don’t worry, I won’t bore you for too long. Just a few most important points to make sure that you and the keyboard are safe (yes, you can damage not only yourself but also the keyboard).
- If you want to safely remove the keycaps you need to use the keycap puller. If you’re trying to skip the tool and save some money… Well, you can lose a lot more by damaging your keyboard in the process.
- This should go without a say – clean your hands before changing the keycaps
You should keep your hands clean when typing on the keyboard at all time. Please, don’t type on your keyboard after eating Cheetos. Just don’t.
If you don’t clean your hands before modding your keycaps a lot of bad things can happen. Not only will you make your new set dirty before you even had a chance to type on it. You can also get some debris into your switches (as they are less protected without keycaps on them).
That will make the keyboard feel way worse. You would need to take apart the keyboard to clean and lube the switches – if your keyboard is hot-swap. If not you would have even more trouble. So please, just keep your hands clean.
Can you remove the keycaps on every keyboard?
There’s one last thing that you need to make sure of before you start taking your keyboard apart. That is whether or not your keyboard is actually capable of removing keycaps.
You can’t remove keycaps on every single keyboard there is. You need to make sure that the keyboard is a mechanical one (not a regular membrane) with detachable keycaps. Remember, if you feel like it’s impossible to take the keycap out of the keyboard – stop and make sure the keyboard has detachable keycaps.
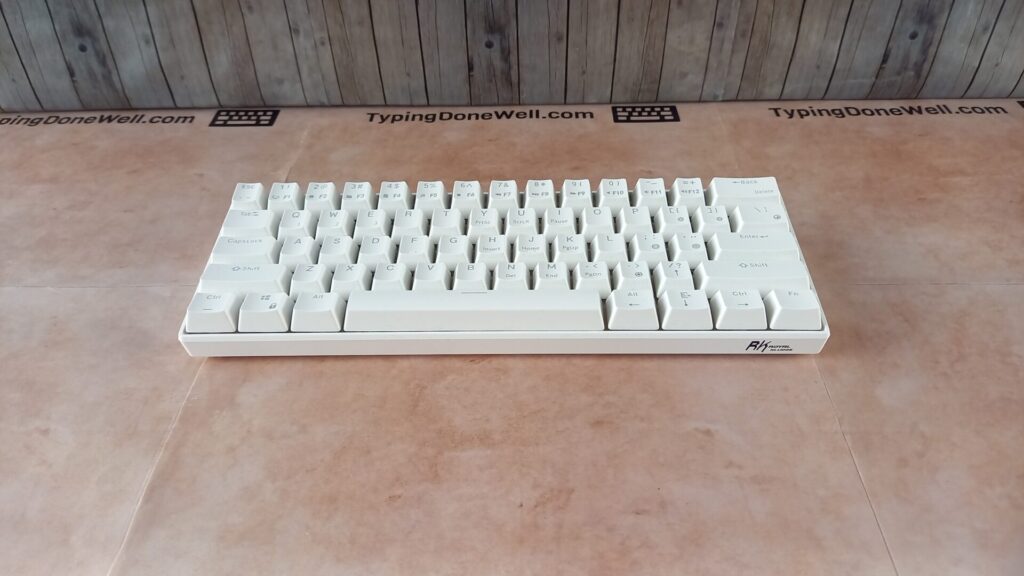
Most of the keyboards will have detachable keycaps. Pretty much all of the mechanical ones do. Here’s an example of a keyboard that you can remove keycaps from:
On the other hand, you might have a membrane keyboard, like the one on the laptop. Those keyboards don’t have detachable keycaps.
Now, everyone knows what a laptop keyboard looks like. I don’t think I need to show that. What I’ll give you is an example of a membrane keyboard that you can’t (shouldn’t) remove keycaps from:
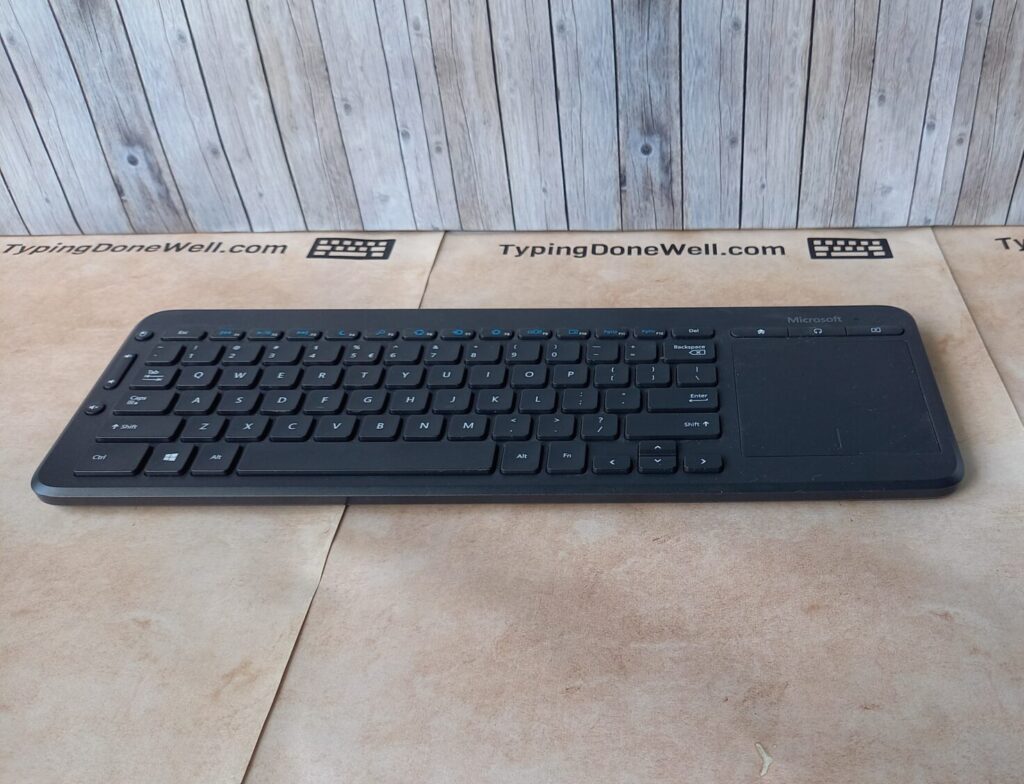
Well, to be completely honest you can remove even those ones. They have a different mechanism (scissor mechanism) and detaching the membrane keyboard’s keycaps is something way more advanced which can easily destroy said mechanism. But even more advanced people don’t mod membrane keycaps, there’s just no point.
How to remove keycaps on a mechanical keyboard?
You’ve learned all that you need to know before starting and you have your keycap puller ready with a set of beautiful, fresh keycaps for your keyboard. That’s exciting, isn’t it? Let’s get to work then, shall we?
Removing keycaps from a keyboard is a task that’s best performed with a keycap puller. First, take this tool and hook it behind the keycap on both sides. Make sure you’re holding it as straight as possible. Then while holding down the keyboard with your other hand pull the keycap out of place slowly increasing the force.
It is pretty straightforward, at least the idea. But let me break it down for you:
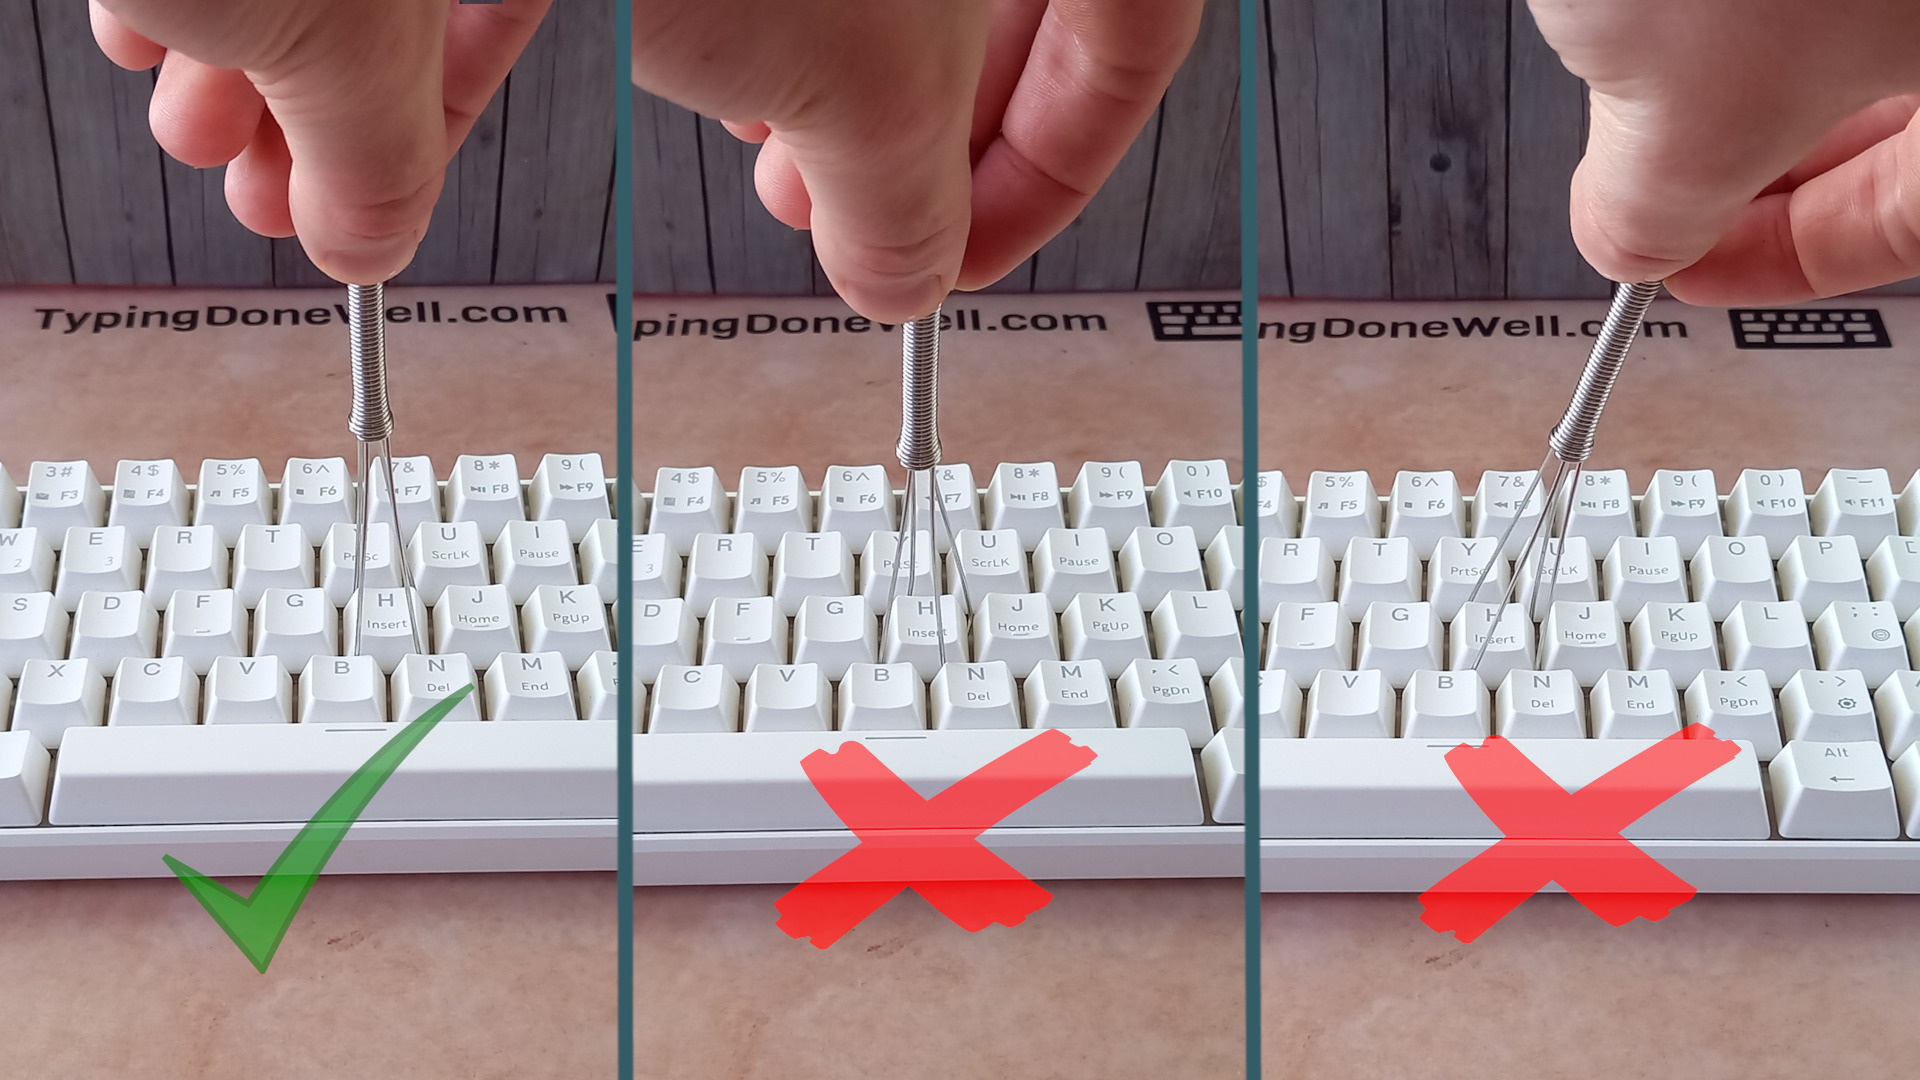
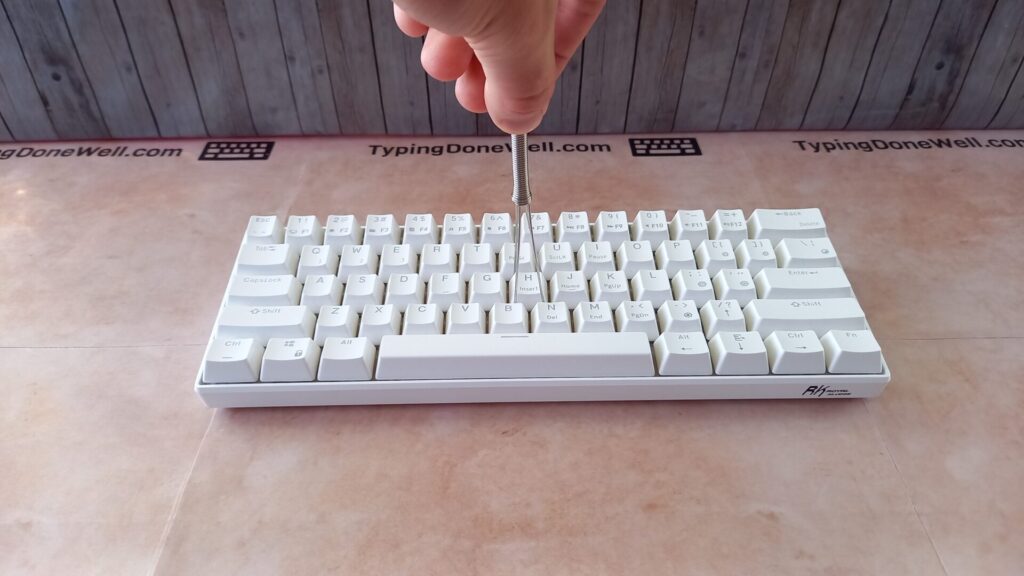
First, take the keycap puller and hook it behind (below) the keycap that you want to remove. Make sure that the puller sits as much in the middle of the key as possible. It will look like that:
Secondly, you need to make sure that the keycap puller is straight. You don’t want to start pulling the keycap out on an angle. That could cause damage to your keyboard’s switches, which we don’t want.
Don’t move the tool forwards and backwards or left and right. Keep it as centered as you can. You also need to watch out for pivot. Don’t rotate the keycap puller around as it will make it harder to remove the keycap and it will increase the possibility of damaging the switch.
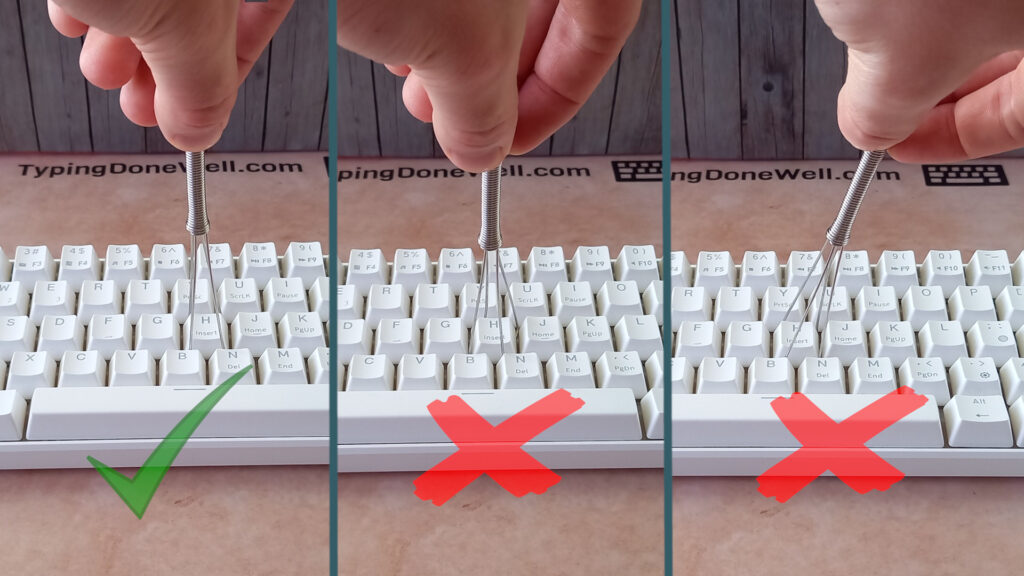
Finally, once you’re ready, it’s time to pull the keycap out. Hold the keyboard down with your other hand so that everything’s stable. Start pulling the keycap upwards with a light force. Then slowly increase the force you’re pulling with.
Watch out for any bad signs. If after applying a lot of force the keycap is still in place go back and make sure you’re doing everything correctly. Here’s a video of how removing a keycap should look like:
If you’ve tried 2 or 3 times and there’s that one keycap that is impossible to remove you can use a little trick. When pulling move the keycap puller only very slightly in a small circle. This will make it easier to take out the most stubborn keycaps.
But remember, use this last method only when you need it. This trick can increase the chance of damaging your switch if you’re not careful, so I don’t recommend it for every keycap.
How to remove keycaps with stabilizers?
You already know how to remove the regular keycaps. But what about those bigger keys? How can you pull the bigger keycaps out of both switch and stabilizers?
Actually, it’s not much different from the regular key. The only real difference is the size of the keycap that you’re trying to remove.
Removing keycaps with stabilizers (keys like Space, Enter, Shift) is very similar to removing regular keycaps. You need to do this with a keycap puller. First, hook this tool properly (like in my instruction). Then pull the keycap while slowly increasing the force.
With keys like Enter, Shift, or Backspace the technique is exactly the same as with any regular key. All you need to do is hook the keycap puller behind the keycap on both sides and (while keeping it straight) pull it off.
However, you might have a bit of trouble with Space – you can’t hook the tool on both sides at the same time.
To remove the Space key start by hooking the keycap puller on one side and lifting it gently. Then move to the other side and detach it from the stabilizer. Finally, slip the keycap puller towards the middle and remove the spacebar completely.
Here’s how it should look like:
That’s all, it’s pretty simple. Now you can remove every single keycap on your keyboard safely. Just remember to have a bit of common sense and stop pulling if it’s very hard to do. It’s better to check 3 times than destroy your keyboard, especially when you’re doing it for the first time.
How do you attach keycaps?
Alright, now that you’ve removed all of the keycaps from your keyboard it’s time to put the new ones in. Luckily this step is way simpler and faster than removing keycaps.
In order to attach keycaps to the keyboard you need to press them into the correct place. First, make sure that the keycap fits and is the right way up. Then carefully place the keycap on top of the switch and press it down while slowly increasing the force.
It’s simple, really. Just make sure that you’re pressing the keycap straight down into the correct place. You could, in theory, damage your switch if you’re not careful. It never happened to me but I’ve never rushed it so maybe that’s why.
Just to make it easier for you to see the proper way I’ve made a video. Here you can see how to remove the keycap and then attach the new one into its place:
Some keycaps can be pretty hard to attach onto switches. It all depends on the set that you bought. In fact, it’s better it the keycap is hard to attach – it means that it will stay securely in place while typing.
If you have a set (or a single keycap) that’s hard to attach to your keyboard, don’t worry. Just take your time and do it carefully. In most cases, that’s all it takes to attach any keycap, even the very tight ones.
Is it OK to pull keycaps with fingers?
Many people are wondering if you can remove the keycaps from your keyboard just by using your hands. The answer to this question is yes, you can. I’ve done it before and most keyboard modders have.
However, I don’t recommend doing that on a large scale. It’s hard to do, very time-consuming, and easy to damage your keyboard along the way.
Pulling keycaps from a keyboard is best done with a keycap puller. If you remove one keycap with your fingers probably nothing bad will happen (no guarantee). However, doing so for a whole keyboard is very cumbersome and has a higher risk of damaging your keyboard.
A keycap puller is very cheap. Really, there’s no reason to put yourself through all that trouble of taking keycaps out with just your fingers. Especially since you can easily lose money and time by damaging your keyboard. Not even getting into the damage that you would do to your fingers and the potential bleeding that would stain your keyboard.
Here, I will even give you a link to where you can directly buy a keycap puller from. It will make your life 10x easier and probably save you money (you won’t damage your keyboard) – BUY A KEYCAP PULLER
Do yourself a favor and buy a keycap puller alongside the keycap set that you want.
Now, I wish you safe keycaps upgrade and a lot of fun doing it! You can let me know how it went in the comments below. I would love to see the difference that a great set of keycaps made on your keyboard so feel free to post some photos down below!
